Where are the recorded video files saved, and how can I change the save location?
In oCam, recorded video files are automatically saved to the folder you specified as the save path.
By default, oCam saves files to the default folder configured on your computer.
To check this folder, first run the oCam program and go to the main screen.
Click the Open button on the main screen, and the folder where recorded video files are saved will appear.
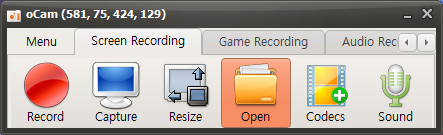
Clicking this button automatically opens Windows Explorer so you can check the folder directly.
If you want to change the save path, click the Settings button on the oCam main screen.
When the Settings window opens, go to the Save tab at the top and find the save path setting option.
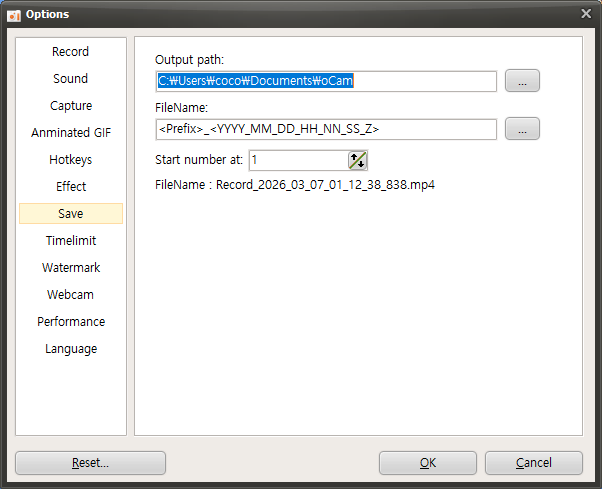
You can change the path by clicking here and selecting a desired folder.
After saving the changed path, all future recorded video files will be saved to the new location.
In addition, setting the save path to a folder you use often makes file management much more convenient.
Today's News/Tips
How to Set Up Automatic Login Using Autologon.exe
Here is how to set up automatic login using the autologin tool.
This method uses Autologon.exe from Microsoft's official Sysinternals Suite. It also provides a certain level of security by storing the password in encrypted form in the registry.
How to Set Up Automatic Login Using Autologon.exe
1. Download Autologon
Official Microsoft site: https://learn.microsoft.com/en-us/sysinternals/downloads/autologon
File download link: https://download.sysinternals.com/files/AutoLogon.zip
Click the Download Autologon button at the link above to download the ZIP file.
After extracting it, you will see the `Autologon.exe` file.
2. Run Autologon and Configure It
Run `Autologon.exe` as administrator. (Right-click → "Run as administrator")
When the window opens:
Username: The account to log in automatically
Domain: In most cases, the computer name is filled in automatically
Password: Enter the password for that account
Click the [Enable] button
If the message “Autologon successfully configured” appears, setup is complete!
3. How to Disable Automatic Login
Run `Autologon.exe` the same way and click [Disable] to turn off automatic login.