How to Set Recording Quality (From High Quality to Low Quality)
How to Set Recording Quality ( From High Quality to Low Quality )
Note: This setting does not apply to external codecs and only applies to oCam's built-in codecs. Lowering the recording quality will reduce the size of the recorded video file, but the video quality will also decrease.
There is a menu at the top of oCam. Click Tools - Options, then click Encoding on the left, and you can select the quality as shown below. By default, it is set to Very High (high quality).
You can choose from the following quality levels when recording.
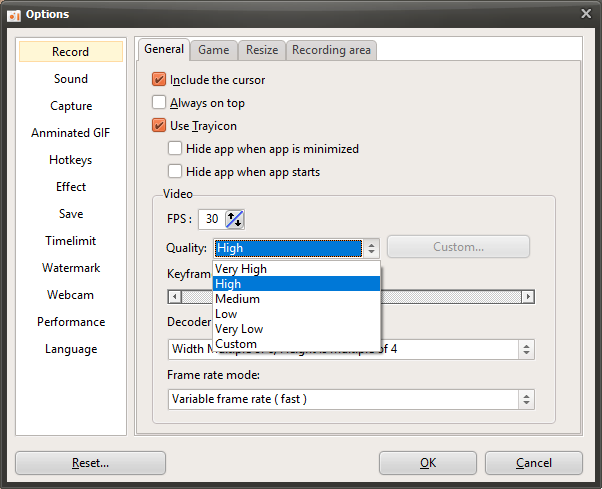
Below are captured preview images showing the recorded quality from Very High to Very Low.
Recorded at Very High

Recorded at High

Recorded at Medium

Recorded at Low

Recorded at Very Low

Today's News/Tips
The system stutters during recording.
If your system becomes slow during recording or the mouse movement stutters, this is likely related to high system resource usage.
In particular, when trying to record high resolution or high frame rates with oCam, this issue can occur if your PC specifications cannot handle the workload.
To solve this, you can reduce system load by adjusting several settings.
First, after running the oCam program, click the Settings button on the main window.
When the Settings window opens, go to the Encoding tab at the top and check the related options.
In this area, you can adjust the Frames Per Second (FPS) setting. If the default is set to 30, try lowering it gradually.
For example, reduce the FPS step by step to 25, 20, 15, and 10, and check whether stuttering decreases.
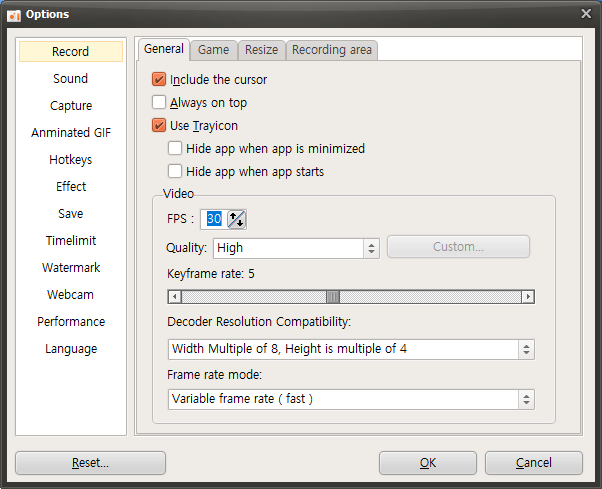
It is important to find an FPS value that is optimal for your PC specifications through this process.
Additionally, lowering the recording resolution or closing unnecessary background programs can also help reduce system load.
We recommend making these adjustments to balance system performance and recording quality.